
Accept one-time payment
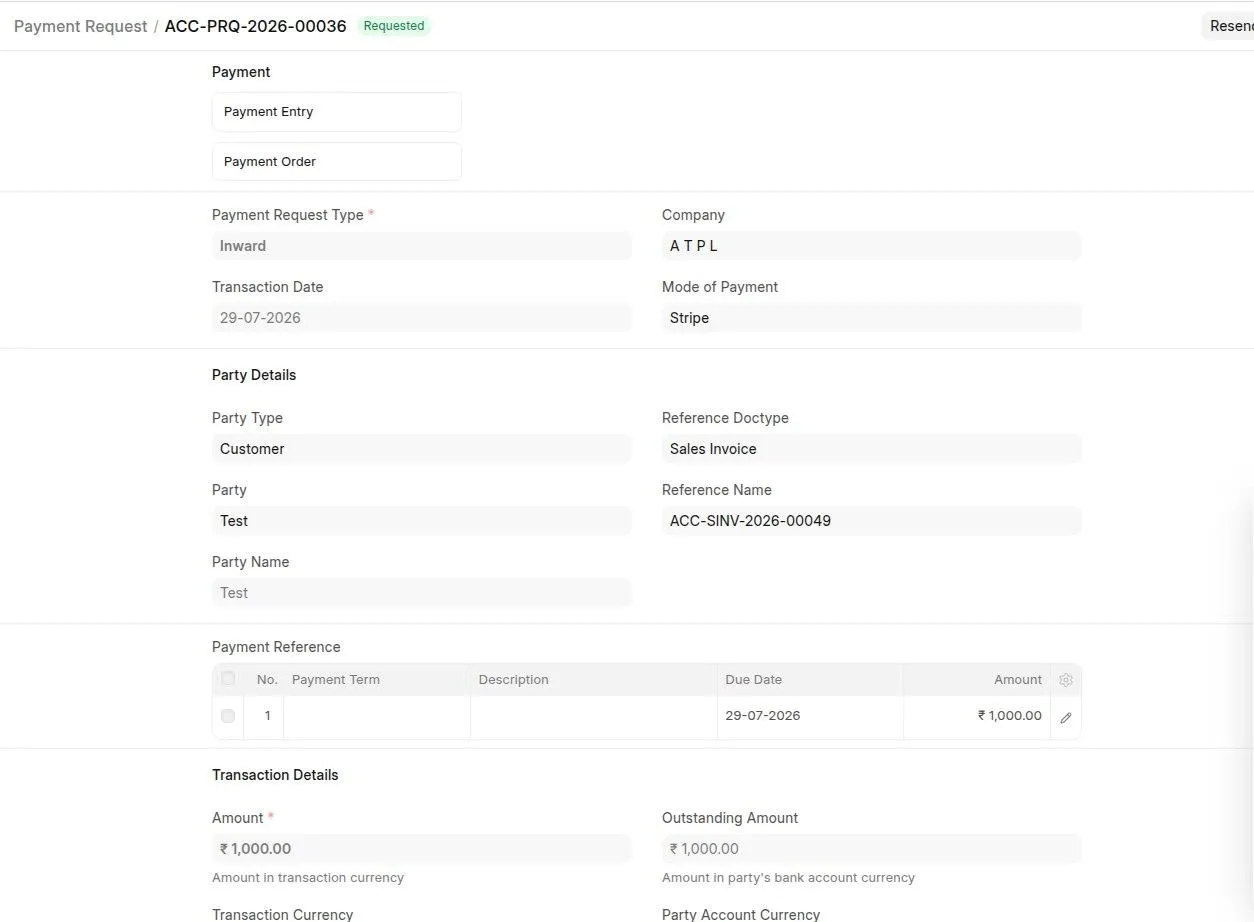
Create a Payment Request from a Sales Invoice or Sales Order and share its payment link with the customer.
Create the Payment Request
Complete the Stripe setup and webhook configuration, use test keys for the first payment, and submit the Sales Invoice or Sales Order that the customer will pay.
- Open the submitted Sales Invoice or Sales Order.
- Click Create > Payment Request or Make > Payment Request, depending on your ERPNext version.
- Confirm the party, amount, currency, and reference document.
- Select the Payment Gateway Account created for Stripe.
- Save and submit the Payment Request.Process one-time payments through Stripe for Sales Invoices, Sales Orders, and custom payment requests using the Hosted Checkout flow.
Payment Flow Overview
Standard One-Time Payment Process
1. ERPNext Document → 2. Payment Request → 3. Stripe Checkout →
4. Customer Payment → 5. Webhook Confirmation → 6. Payment Entry
Step-by-Step:
- Initiation: Customer receives invoice/order with payment link
- Payment Request: ERPNext creates Payment Request document
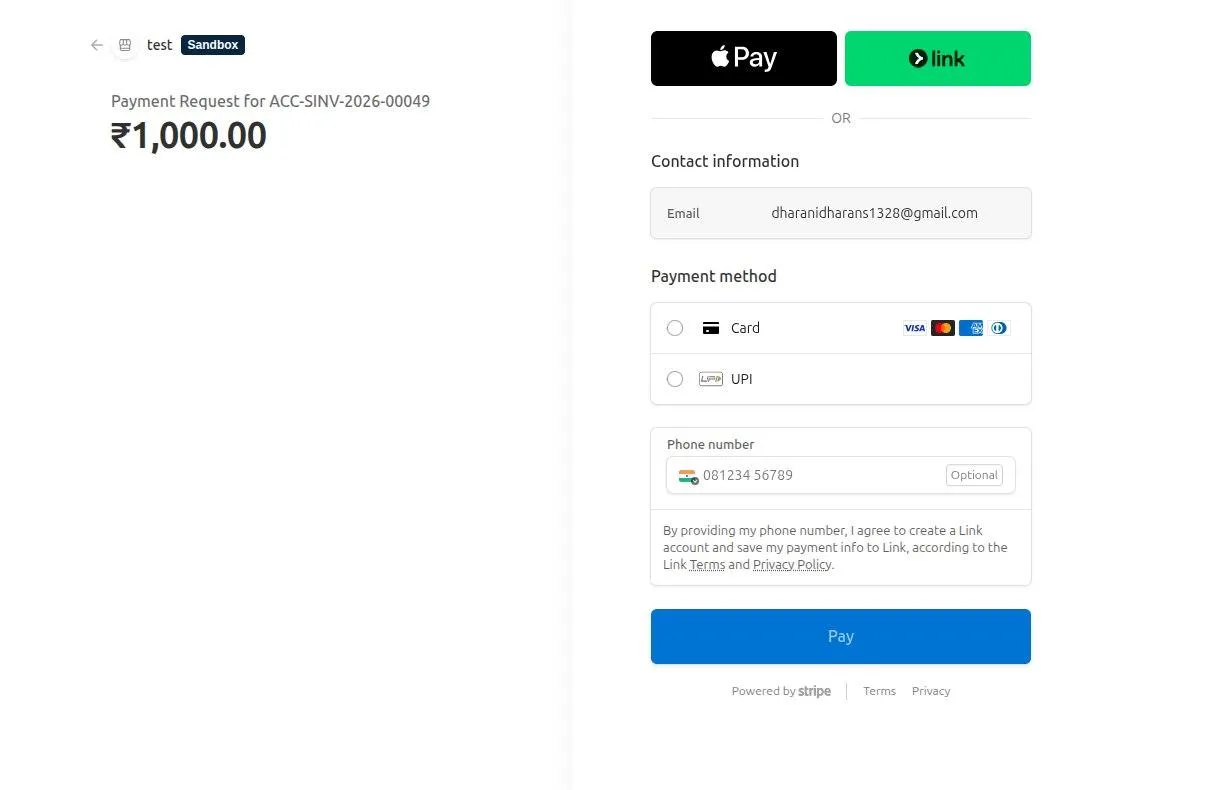
- Stripe Redirect: Customer redirected to Stripe-hosted checkout
- Payment: Customer completes payment on Stripe's secure page
- Webhook: Stripe sends payment confirmation to ERPNext
- Reconciliation: ERPNext creates Payment Entry and updates document status
Accepting Payments from Different Document Types
From Sales Invoice
Most common use case - customers pay outstanding invoices:
- Open Sales Invoice: Navigate to the invoice to be paid
Send the customer to Stripe
- Copy the Payment URL from the Payment Request, or send the Payment Request by email.
- Open the link in a private browser window when testing.
- Complete the payment on the Stripe-hosted checkout page using a Stripe test payment method.
Confirm the result in ERPNext
After Stripe confirms the payment, ERPNext:
- Marks the Payment Request as paid
- Creates and submits a Payment Entry for the charged amount
- Allocates the Payment Entry to the reference document
- Updates a Sales Invoice to Paid or Partly Paid, according to its remaining balance

Verify the payment
- Open the Payment Request and follow the linked Payment Entry.
- Confirm that the Payment Entry amount, currency, reference number, and reference document are correct.
- Open Stripe Webhook Log and confirm the related event is Processed.
If Stripe shows a successful payment but ERPNext does not create a Payment Entry, follow Check whether a payment synced.
Troubleshooting
- If Stripe is unavailable on the Payment Request, check the company and account on the Stripe Payment Gateway Account.
- If checkout reports an authentication error, verify that Stripe Settings contains a matching, active publishable key and secret key.
- If Stripe shows a successful charge while ERPNext remains unpaid, check the matching Stripe Webhook Log and follow Check whether a payment synced. Confirm the existing payment before asking the customer to try again.
Last updated 3 weeks ago
Was this helpful?