
Create a custom app in Shopify
Before ERPNext can connect to your Shopify store, create a custom app in your Shopify Admin and generate the API credentials required for the integration.
Open the Apps section
In your Shopify admin, go to Apps in the left sidebar.
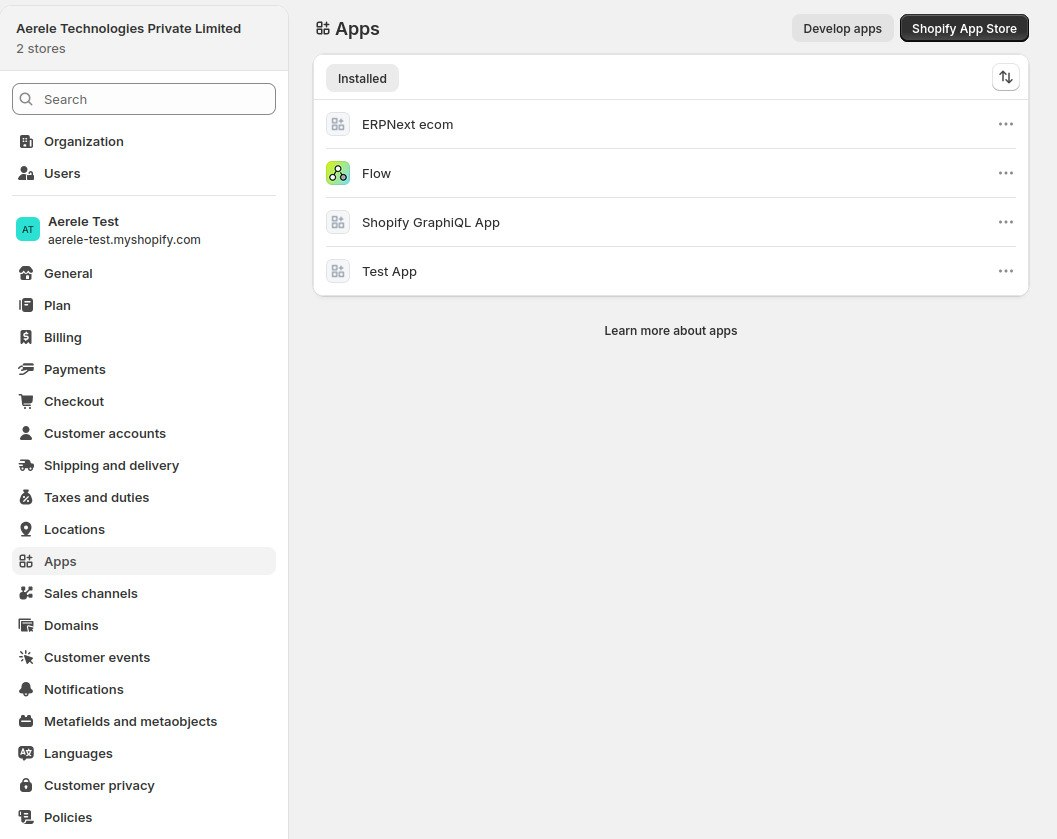
Start building a custom app
Select Develop apps for your store, then create a new app.
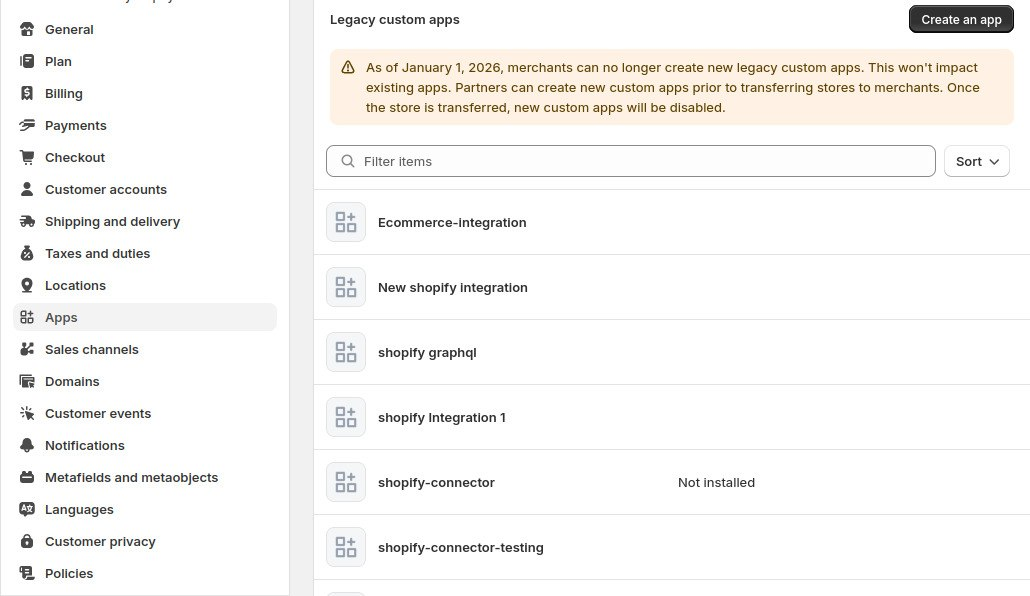
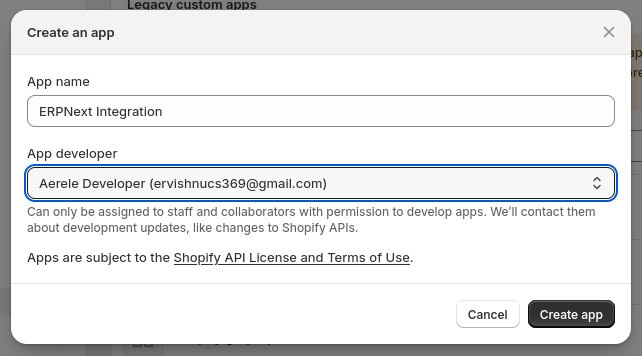
Give the app a name (for example, "ERPNext Integration") and confirm the developer.
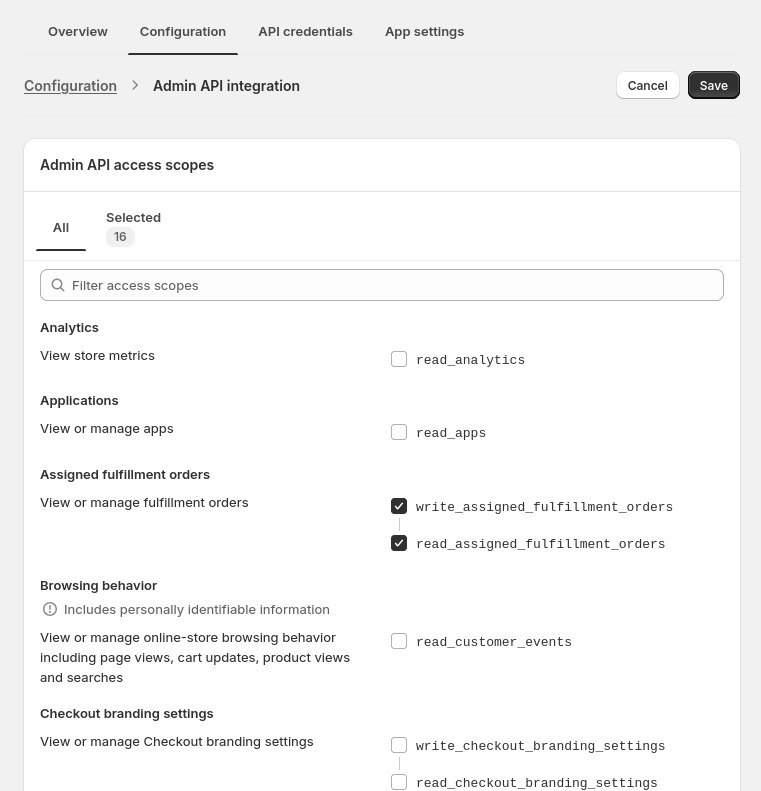
Grant it access to your store data
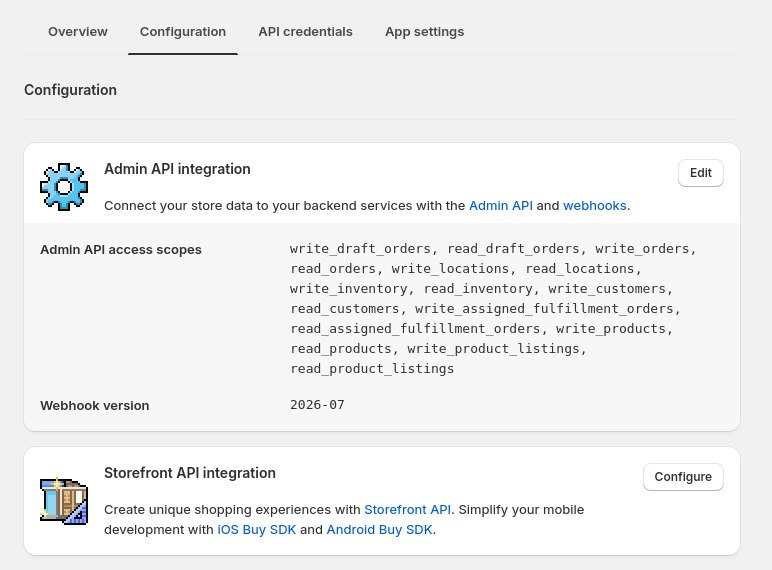
Open Configure Admin API Scopes and enable the API permissions required for ERPNext to synchronize orders, products, and inventory:
- Draft Orders - Read and write
- Orders - Read and write
- Locations - Read
- Customers - Read
- Assigned fulfillment orders - Read and write
- Products - Read and write
- Product listings - Read and write
- Inventory - Read and write
Save the scopes once they are selected.
Install the app and get your credentials
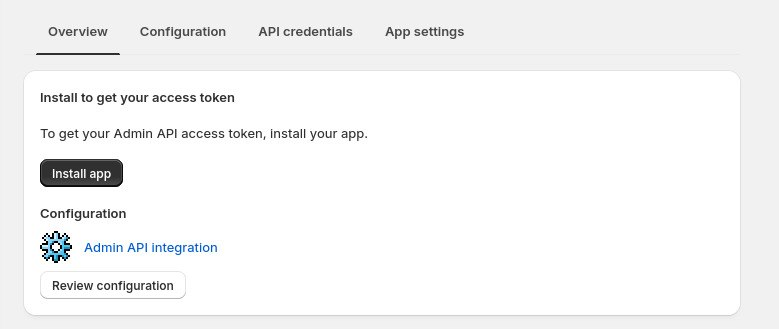
Install the Custom App on your Shopify store, then open the API Credentials tab to obtain the Admin API Access Token and API Secret Key. You will use these credentials in ERPNext in the next step.
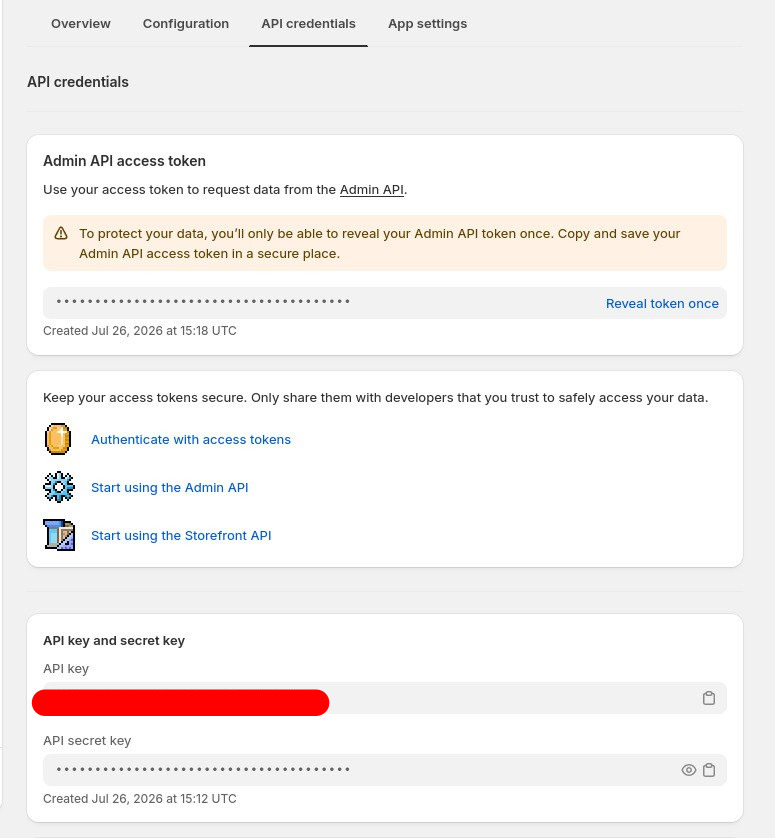
Tip: Shopify only lets you reveal the Admin API access token once. Copy it somewhere safe right away, or you will need to regenerate it later.